

Predefined Regions
Being more than halfway through the new features, this would be a good time to take a look back and recap what we have presented so far. We’ve taken a look at the prerequisites for Sites 9, we’ve seen a lot of various improvements, mostly architectural (DXD, DXA, Docs integration, etc.), there were some API changes and improvements, scalability improvements, etc. This time however, we will focus more on the good old Content Manager and Content Manager Explorer. Personally, I like the concept of Predefined Regions quite a lot, and hope you do as well. So, here’s what they are all about…
Bye-bye Component Presentations tab
One of the reasons for introducing the predefined regions is to make the lives of content editors easier. In the previous versions of Tridion, it was up to the content editor to know the specifics for each of the page templates when creating pages. Depending on the page template, a specific metadata schema and related metadata might be required. Similar pre-requisites existed with component presentations, some types must have existed on the page, while others were needed to be added in a specific order to not break the layout. Another big issue was that the list of component presentations was linear so it was not clear which component belonged where and where on the page it would show up (in which section). All this caused the process of creating pages to be error prone and somewhat chaotic/difficult to overview. The image below shows a page’s component presentation list and the resulting page pre-Sites 9:
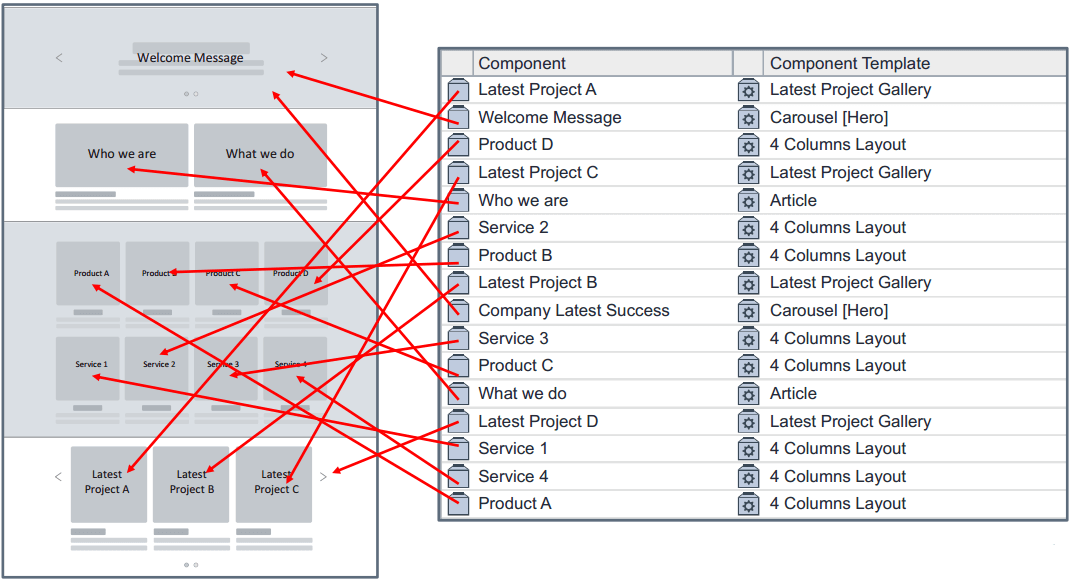 Old style of adding component presentations and resulting layout
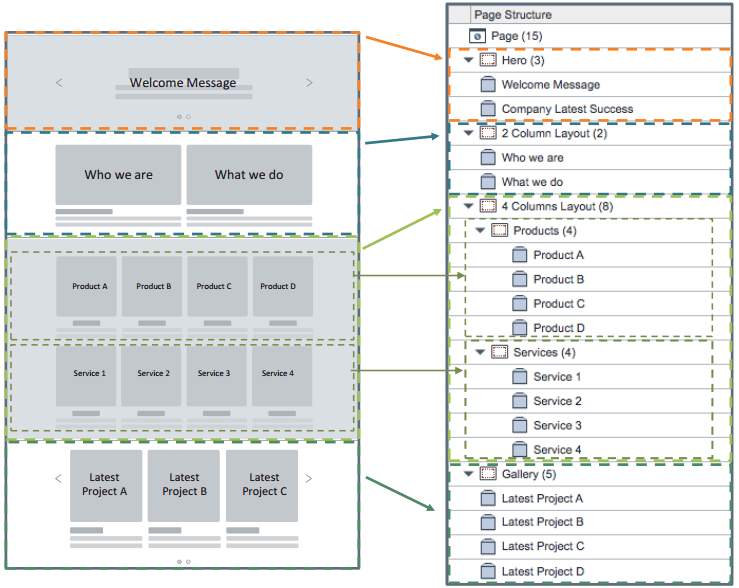
Now with page regions in Sites 9 the same page looks like the below:
 Page regions example and the resulting page
Looking at the image, the first thing that pops out is that the components are now organized into regions, they are represented by the colored and dashed rectangles on the image. By looking more closely, we can see that a region can have nested regions; for example, Products and Services are nested regions of the 4 Columns Layout region. Another big difference is that there is no more component template information shown (directly). This is because component templates are not as important any more. To be more precise, knowing which component template is used is not that important. All this is because each region can have a set of conditions which limits what can be added to it.
The image below shows what the page designer in the CME looks like. Notice that there is no more Component Presentations tab, instead, there is a Design tab. By clicking each of the regions, you can add component presentations and metadata to them.
 Page designer
Regions, region schemas and conditions, and page schemas
Regions
A region is a container for content on a page and is defined by the following properties:
- Name (e.g. Article)
- Fully-qualified name (FQN) (e.g. Main\Article)
- Schema
- List of component presentations
- List of nested regions
- Metadata
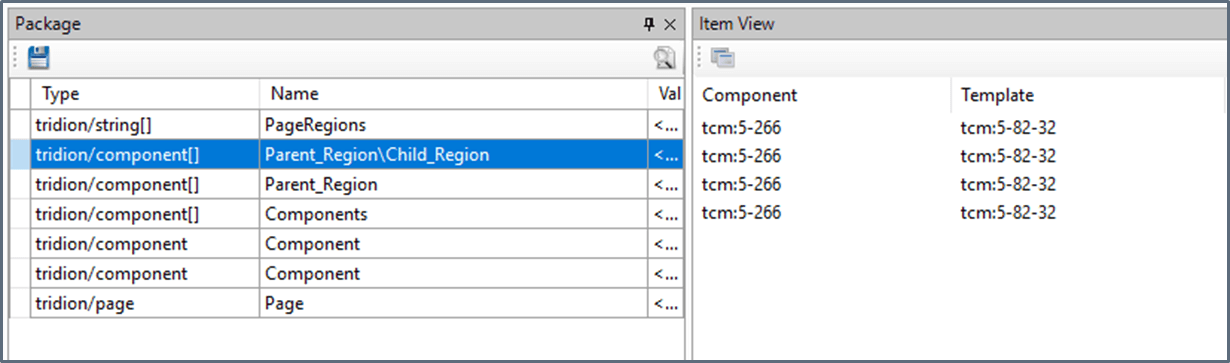
The new approach of assembling pages is also supported by the APIs, an example of creating a page using the CoreService is shown below. The FQN is useful for “addressing” specific regions from code.
// Create page object and fill in its properties PageData page = new PageData(TcmUri.UriNull); … // Create a region and add CPs into it EmbeddedRegionData region = new EmbeddedRegionData(“Left Section”, page); region.ComponetPresentations = new[] { new ComponenPresentationData(page) { Component = new Link(“tcm:1-44”), ComponetTemplate = new Link(“tcm:1-55-32”) } }; // Add region to a page page.Regions = new RegionList { region };Region schemas and conditions
The region schema is a new type of schema and defines the following properties:
- Constraints
- Nested regions
- Metadata
 Region Schema Designer – Design Tab
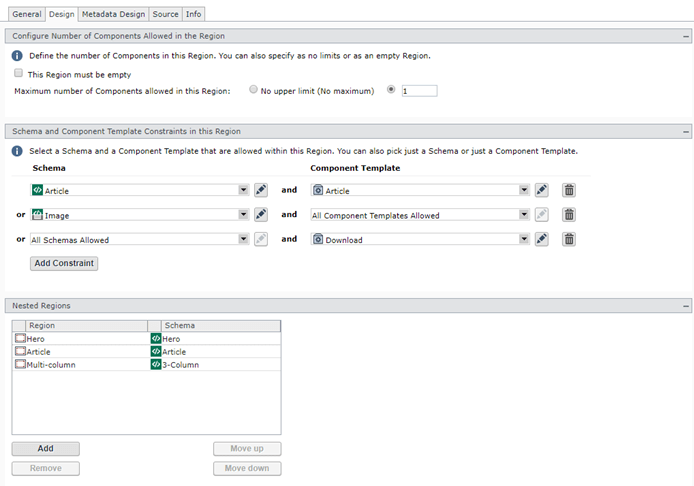
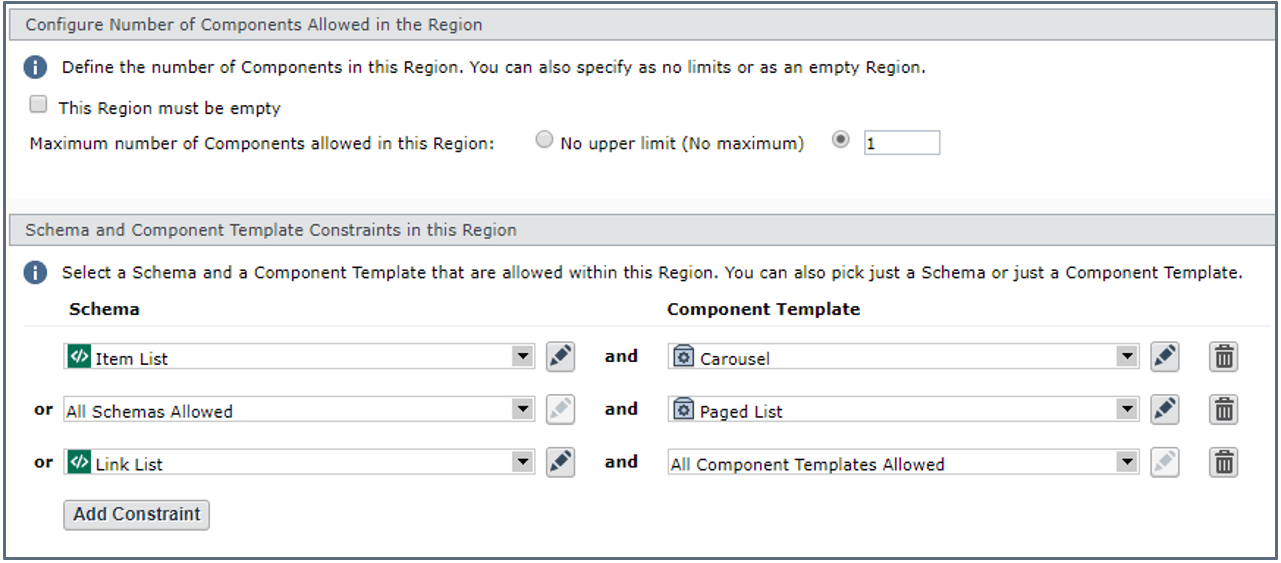
The constraints mechanism allows us to set up limitations for a region. There are two types of constraints, occurrence constraints and type constraints.
Occurrence constraints define the maximum number of component presentations which can be added to a specific region. This allows for a special case when a region has no component presentation, but instead serves only as a container region (possibly with some metadata).
Type constraints limit that only components based on certain schemas, or components in combination with only certain component templates are allowed. Both schema and component template can be limited, you can have only one type of type constraint, or neither of them.
The constraints are automatically applied when browsing for a component. Those components which don’t match the schema constraint are greyed out, and the list of available component templates is also filtered out. In the case that only one component template is available for the given schema and component template constraint, it is pre-selected, which is a cute little feature :).
A screenshot of the constraints is shown below. By effectively using the constraints we can limit, and at the same time also instruct, the content editor to use the proper component presentations. This is the reason why the component template information is not that important in the component presentation overview list (Design tab).
 Constraints example
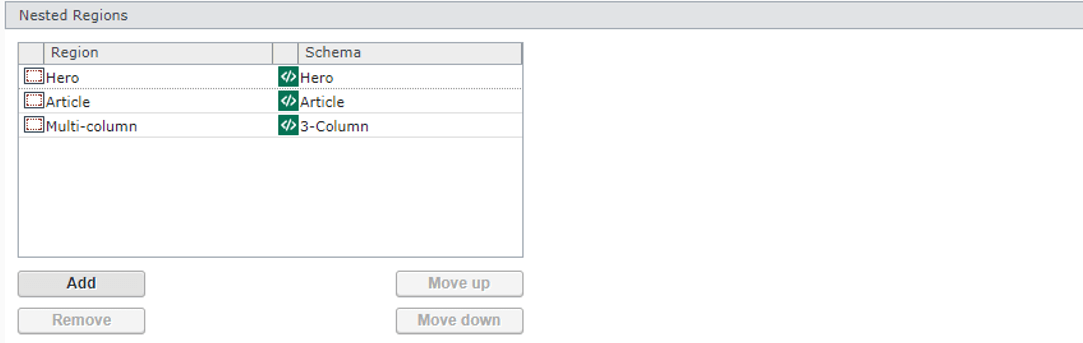
The nested regions property is used to define which nested regions the region has. A nested region is defined by its name and region schema. The nested regions section of a region schema is shown below:
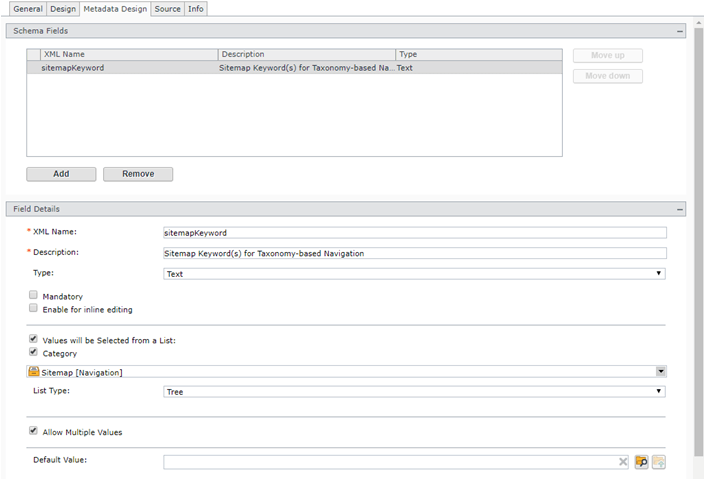
Defining the metadata of a region is the same as with a regular component schema. Example below:
 Region Schema Designer – Metadata Design Tab
Page schema
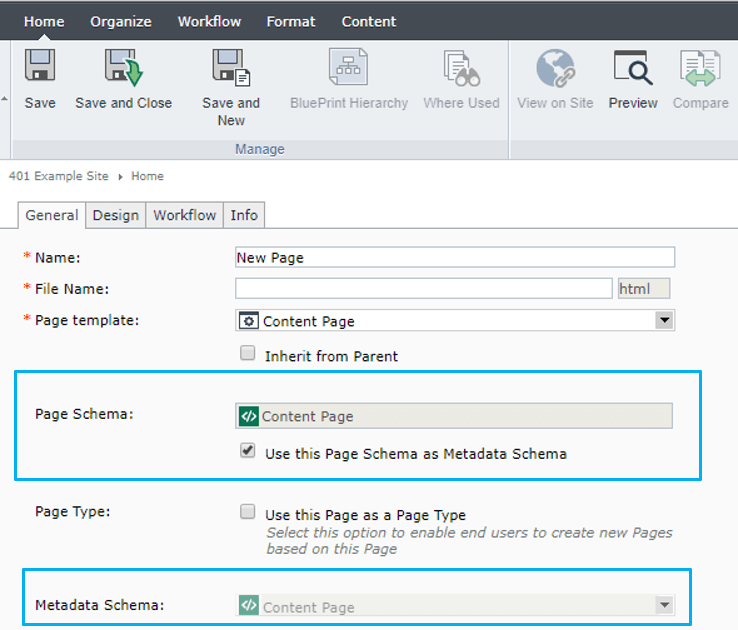
Before we take a look at what a page schema actually is, it is important to understand that a page itself is a region. If we have that in mind, it’s quite easy to understand the concept of page schemas. It’s nothing more than a region schema attached to the page. The page schema is defined on the page template level and because a region schema can have metadata, it’s meant to replace the (page) metadata schemas. The “old metadata schemas” are still allowed but just for legacy reasons. There is a checkbox which controls where the page gets its metadata. Notice however that if we don’t attach a page schema to the page, we have none of the new functionality in the design tab. The component presentations will again be a flat list. A screenshot of how this looks like is shown below:
 Page Schema
Experience Manager
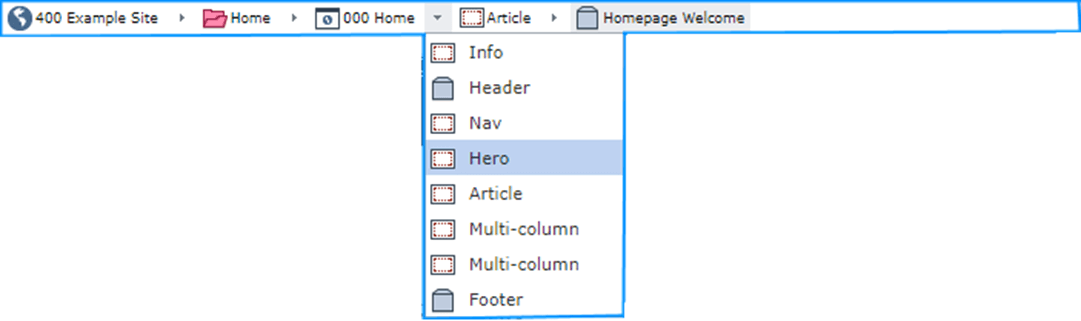
Page regions are also supported in XPM. The regions are now shown in the breadcrumb and there is a little arrow which will open a dropdown so that you can access the nested regions. Because a region can have no component presentations inside, this is the only way to select it (it is rendered with 0 height). Once a region is selected, a component can be added to it either from the menu or via drag and drop. Image of the breadcrumbs and nested regions is shown below:
 XPM breadcrumb and nested regions
Templating
Page regions are also supported in modular templating. There is a new default template building block called “Extract Components from Regions” which is similar to the “Extract Component from Page”, the difference is that instead of a flat list of component presentations, the new template building block results in the PageRegions package item which contains a list of regions (their fully qualified names), and for each region there will be an additional package variable containing the component presentations in that region. Example below:
Extract Components from Regions result
Because for each of the regions there is a package item with the contained component presentations created, you can use the following markup to render them:
Besides the new template building block, there are changes in the XPM building blocks as well, rather their output. They now output markup for the regions as well, this includes the constraints information. Example markup shown below:
This will be all for this week’s presentation, stay tuned for the last one :). As always, if you have any questions or would like to share your thoughts, don’t hesitate to get in contact.
Disclaimer: All images are copied from SDL with their permission.